Building a Countdown Webpage for the Codesphere Hackathon
The winner of the Codesphere Community Challenge shows us how to build a NTP-Based Countdown Webpage 🎃

Codesphere is a new cloud-based IDE that allows you to develop, build, and deploy your applications in the cloud. It is a great tool for hackathons, as it allows you to collaborate with your team members in real-time and deploy your application with a single click.
They have started a hackathon in November 2023, the task is to build a countdown with HTML, CSS and JS. Sounds quite simple, doesn't it? One of the goals is to make the countdown as accurate as possible.
The plan
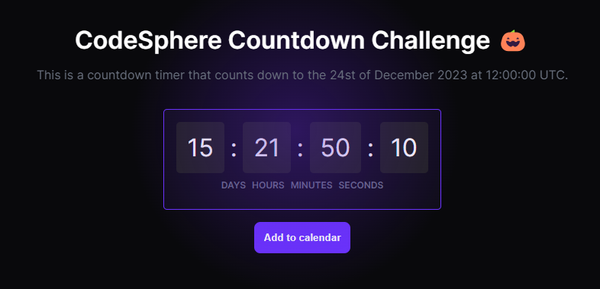
We will build a simple countdown with HTML, CSS and JS. I want to style it like the CodeSphere website, a lot of black and a lot of purple.
There is a problem with the logical part of the countdown. Most would simply create a date object and count down based on that. That's not accurate enough, the solution is NTP (Network Time Protocol). It is a protocol that allows synchronizing the time of your computer with a server. Its very accurate, but it is not really made for browsers, this is why I built a small web server that returns the time from the NTP server.
After we have the time, we can calculate the remaining time and display it on the website. What I also want to do is beautiful glow effect on the page, and a button to download the Event to your calendar.
Getting Started
I built the app locally, you can find the repository here on GitHub.
Prerequisites
You need to have Node.js installed on your computer. (Or use CodeSphere IDE)
We start by creating a new folder and installing the dependencies we need:
mkdir codesphere-challenge
cd codesphere-challenge

npm init -y
npm install express ntp-client cors
Setting up the server
We start by creating a new file called index.js and add the following code:
const express = require("express");
const ntpClient = require("ntp-client");
const cors = require("cors");

const app = express();
const port = 3000;

app.use(cors());
app.use(express.static("public"));

app.get("/getDateTime", (req, res) => {
  ntpClient.getNetworkTime("ptbtime1.ptb.de", 123, (err, date) => {
    if (err) {
      console.error(err);
      return res
        .status(500)
        .json({ error: "Failed to fetch date and time from NTP server" });
    }

    const dateTimeString = date.toString();

    return res.json({ dateTime: dateTimeString });
  });
});

app.listen(port, () => {
  console.log(`Server is running on http://localhost:${port}`);
});
We implement a cors-friendly middleware and serve our website out of the folder public/´. Our route /getDateTime` returns the current date and time from the NTP server.
The server is ready to run, start it with node index.js.
Lets start coding the countdown 🎃
We can start with the countdown. We start by creating a folder called public and add two files, index.html and style.css. We also create a file called script.js.
We start with the index.html file. We add a div with the id wrapper and a countdown-container with our elements for days, hours, minutes and seconds. We also add a script tag to include our script.js file.
<!doctype html>

<html lang="en">
  <head>
    <meta charset="utf-8" />
    <meta
      name="viewport"
      content="width=device-width, initial-scale=1, minimum-scale=1"
    />
    <title>Countdown</title>
    <link rel="stylesheet" href="style.css" />
  </head>
  <body>
    <script src="script.js"></script>
    <div id="wrapper">
      <div class="countdown-container">
        <div id="days" class="countdown-item">00</div>
        <div class="countdown-separator">:</div>
        <div id="hours" class="countdown-item">00</div>
        <div class="countdown-separator">:</div>
        <div id="minutes" class="countdown-item">00</div>
        <div class="countdown-separator">:</div>
        <div id="seconds" class="countdown-item">00</div>
      </div>
      <div class="countdown-labels">
        <div class="countdown-label">Days</div>
        <div class="countdown-label">Hours</div>
        <div class="countdown-label">Minutes</div>
        <div class="countdown-label">Seconds</div>
      </div>
    </div>
  </body>
</html>
Now we start with the style.css file. Lets add some basic styling to center the countdown and make it look nice.
body {
  display: flex;
  flex-direction: column;
  align-items: center;
  justify-content: center;
  min-height: 100vh;
  margin: 0;
  background-color: #09090c;
  color: white;
  overflow: hidden;
  cursor: none;
  user-select: none;
  -webkit-user-select: none;
}

.countdown-container {
  display: flex;
  font-size: 2rem;
  justify-content: center;
  align-items: center;
  z-index: 2;
}

.countdown-item {
  display: flex;
  flex-direction: column;
  align-items: center;
  background-color: #212121;
  padding: 14px;
  border-radius: 5px;
}

.countdown-separator {
  margin-left: 0.5rem;
  margin-right: 0.5rem;
}

.countdown-labels {
  display: flex;
  justify-content: center;
  align-items: center;
  margin-bottom: 0.5rem;
  margin-top: 0.5rem;
  gap: 0.5rem;
}

.countdown-label {
  font-size: 0.75rem;
  text-transform: uppercase;
  color: #6b7280;
  font-weight: 600;
}
That's maybe a bit too much CSS for the start, but it's very simple to explain. On the body, we set the height, background color, font color and deactivated the user select. On the countdown container, we set the font size and the alignment. On the countdown item, we set the background color, padding and border radius. On the countdown labels, we set the alignment and the margin.
Now we can start with the script.js file. We start by creating a new function to fetch the date and time from our server. We also initialize some global variables like our countdown date.
// Init global variables
const countDownDate = new Date("Nov 30, 2023 12:00:00");
let ntpServerTime;
let interval;


// Fetch the time using Network Time Protocol
async function fetchNTPServerTime() {
  const ntpServerUrl = "/getDateTime";

  const response = await fetch(ntpServerUrl);
  const ntpResponse = await response.json();

  if (ntpResponse.dateTime) {
    ntpServerTime = new Date(ntpResponse.dateTime);
  }
}
Now we can create a new function to calculate the remaining time. We can do this by subtracting the current time from the countdown date. To make sure that the countdown elements are rendered, we do this in the DOMContentLoaded Event
// init the countdown
document.addEventListener("DOMContentLoaded", async function () {
  // fetch the time once
  await fetchNTPServerTime();

  // function to calculate the time remaining and update the DOM
  function updateCountdown() {
    let now = ntpServerTime ? ntpServerTime.getTime() : Date.now();
    let distance = countDownDate.getTime() - now;

    let days = Math.floor(distance / (1000 * 60 * 60 * 24));
    let hours = Math.floor(
      (distance % (1000 * 60 * 60 * 24)) / (1000 * 60 * 60)
    );
    let minutes = Math.floor((distance % (1000 * 60 * 60)) / (1000 * 60));
    let seconds = Math.floor((distance % (1000 * 60)) / 1000);

    document.getElementById("days").innerText = formatTime(days);
    document.getElementById("hours").innerText = formatTime(hours);
    document.getElementById("minutes").innerText = formatTime(minutes);
    document.getElementById("seconds").innerText = formatTime(seconds);

    // increment the ntp time by 1 second
    ntpServerTime.setSeconds(ntpServerTime.getSeconds() + 1);

    // If the count down is finished, clear the interval to stop the countdown
    if (distance < 0) {
      clearInterval(interval);
    }
  }

  // call the updateCountdown function every 1 second
  updateCountdown();
  interval = setInterval(updateCountdown, 1000);
});
Very simple right? So first time we fetch the NTP time once, then we call our new updateCountdown function, which calculates the remaining time and updates the DOM Elements. We also increment the NTP time by 1 second, to make sure that the time is always accurate.
If there is no remaining time left, we clear the interval to stop the countdown. In combination with our HTML and CSS, our countdown should now look like this:

Adding the glow effect
The glow effect is inspired by Nuxt's Loading Screen and is very simple to implement. We start by adding a new div with the id glow to our index.html file.
<div id="radialGradient"></div>
<div id="textContainer" class="text-container">
  <p id="submittedBy">Made with 💜 by <a href="https://github.com/intevel" class="highlighted">Conner</a></p>
</div>
Now we can add some CSS to make it look nice.
#radialGradient {
  position: fixed;
  width: 100%;
  height: 100%;
  pointer-events: none;
  z-index: 1;
}

.text-container {
  position: absolute;
  bottom: 0px;
  right: 20px;
  cursor: pointer;
  color: rgb(255, 255, 255);
  font-size: 16px;
  opacity: 0.15;
  transition: opacity 0.3s ease;
}

.highlighted {
  color: #8558ff !important;
  text-decoration: none;
}
Now we can add some JavaScript Magic 🎆 to make it glow and moving with our cursor. We start by creating a new function called handleMouseMove and add listen to it the mousemove event.
// glow effect
function handleMouseMove(event) {
  const radialGradient = document.getElementById("radialGradient");
  const textContainer = document.getElementById("textContainer");

  // radius in px near the submitted note
  const radius = 400;

  const mouseX = event.clientX;
  const mouseY = event.clientY;

  radialGradient.style.background = `radial-gradient(circle at ${mouseX}px ${mouseY}px, rgba(90, 36, 196, 0.4) 0%, rgba(90, 36, 196, 0) 20%)`;


  // calculate the opacity of the text
  const textRect = textContainer.getBoundingClientRect();
  const textCenterX = textRect.left + textRect.width / 2;
  const textCenterY = textRect.top + textRect.height / 2;
  const distance = Math.sqrt(
    (mouseX - textCenterX) ** 2 + (mouseY - textCenterY) ** 2
  );

  const minOpacity = 0.1;
  const opacity = 1 - (Math.min(distance, radius) / radius) * (1 - minOpacity);

  textContainer.style.opacity = opacity;
}
A bit math, our submitted by Text should get more opacity when moving near to it. We calculate the distance between the mouse and the text and set the opacity based on that. We also update the background of the radialGradient to make it glow.
Now we can add the event listener to the document.
document.addEventListener("mousemove", handleMouseMove);That's it, our glow effect should now look like this:

Add to calendar button
The last thing we want to do is to add a button to download the event to your calendar. We start by adding a new div with a button and the id add-to-calendar to our index.html file.
<div>
  <button onclick="addToCalendar()" class="add-to-calendar-button">
    Add to calendar
  </button>
</div>
Now we can add some CSS to make it look nice.
.add-to-calendar-button {
  display: flex;
  align-items: center;
  justify-content: center;
  text-align: center;
  background-color: #6b33ff;
  color: white;
  font-weight: 600;
  border-radius: 0.5rem;
  padding: 0.8rem;
  margin-top: 1rem;
  cursor: pointer;
  border: none;
}

.add-to-calendar-button:hover {
  background-color: #5a24c4;
}
Now we can add some JavaScript to make it work. We start by creating a new function called addToCalendar:
// add to calendar button functionality
function addToCalendar() {
  // construct event
  const event = {
    title: "CodeSphere Countdown Challenge 🎃",
    date: countDownDate,
    location: "Online",
  };

  // generate ics file and download it
  const icsContent = generateICS(event);

  const dataUri =
    "data:text/calendar;charset=utf-8," + encodeURIComponent(icsContent);

  const link = document.createElement("a");
  link.href = dataUri;
  link.download = "event.ics";

  document.body.appendChild(link);
  link.click();

  document.body.removeChild(link);
}
Thats the functionality to download the file, but now we have to generate the ICS file. We can do this by adding a new function called generateICS:
// helper function to generate the ics file
function generateICS(event) {
  return `BEGIN:VCALENDAR
VERSION:2.0
BEGIN:VEVENT
SUMMARY:${event.title}
DTSTART:${formatDateForICS(event.date)}
LOCATION:${event.location}
DESCRIPTION:${event.title}
END:VEVENT
END:VCALENDAR`;
}

// helper function to format the date for the ics file
function formatDateForICS(date) {
  function pad(number) {
    if (number < 10) {
      return "0" + number;
    }
    return number;
  }

  const year = date.getUTCFullYear();
  const month = pad(date.getUTCMonth() + 1);
  const day = pad(date.getUTCDate());
  const hours = pad(date.getUTCHours());
  const minutes = pad(date.getUTCMinutes());
  const seconds = pad(date.getUTCSeconds());

  return `${year}${month}${day}T${hours}${minutes}${seconds}Z`;
}
ICS is a file format that allows you to store calendar events. We can generate the file by using the generateICS function. We also have to format the date to the correct format, we can do this by using the formatDateForICS function.
That's it, our button should now work and download the event to your calendar.
Deployment
We can now deploy our app to Codesphere. We start by creating a new project and importing our Repository from GitHub.

This is our project structure, we can now configure the CI using the CI Editor:

In the Prepare step, you have to configure the installation of the dependencies. You can do this by adding a new npm install command.
Since we don't have tests in our project, we can ignore the Test step.
In the Run step we have to configure the start of our server. We can do this by adding a new node index.js command.
That's it, after configuring the CI, the app will be deployed by the pipeline and you can access it using the URL or the "Open Deployment" button. ✨
My deployment: https://46955-3000.2.codesphere.com/
My Blog post: https://www.conner.host/blog/build-a-countdown-for-codesphere
